Configuring NLB
Configuring NLB
Configuring Target Group
Configuring a Target Group allows you to register targets such as EC2 entities. The target group you configure in this step is used as the target group in the listening rule when you configure your load balancer. For more information, see Target groups for Your Network Load Balancers.
To configure your Target Group
-
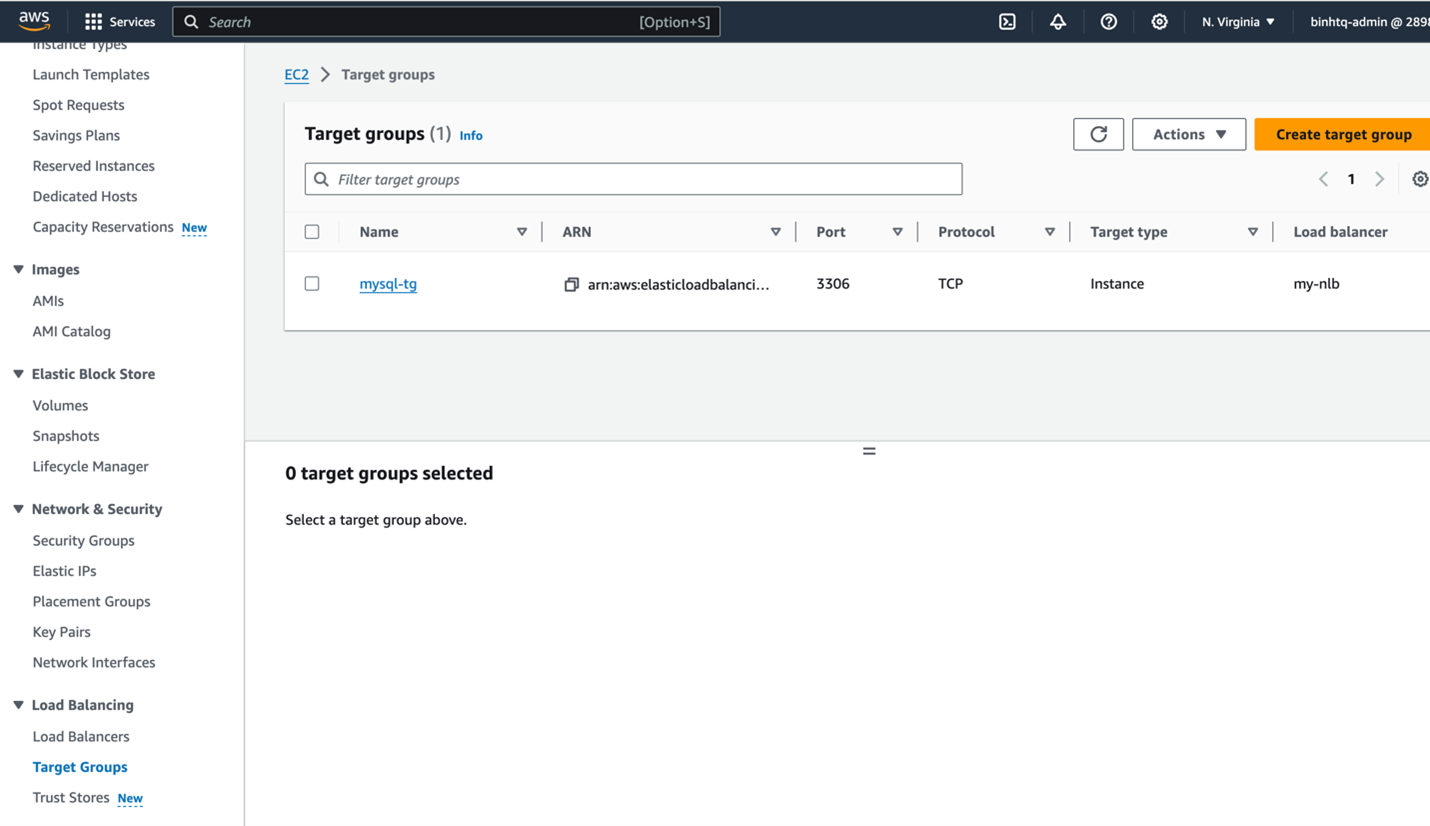
Open the Amazon EC2 console at https://console.aws.amazon.com/ec2/.
-
In the navigation pane, select Target Groups.
-
Choose Create target group.
-
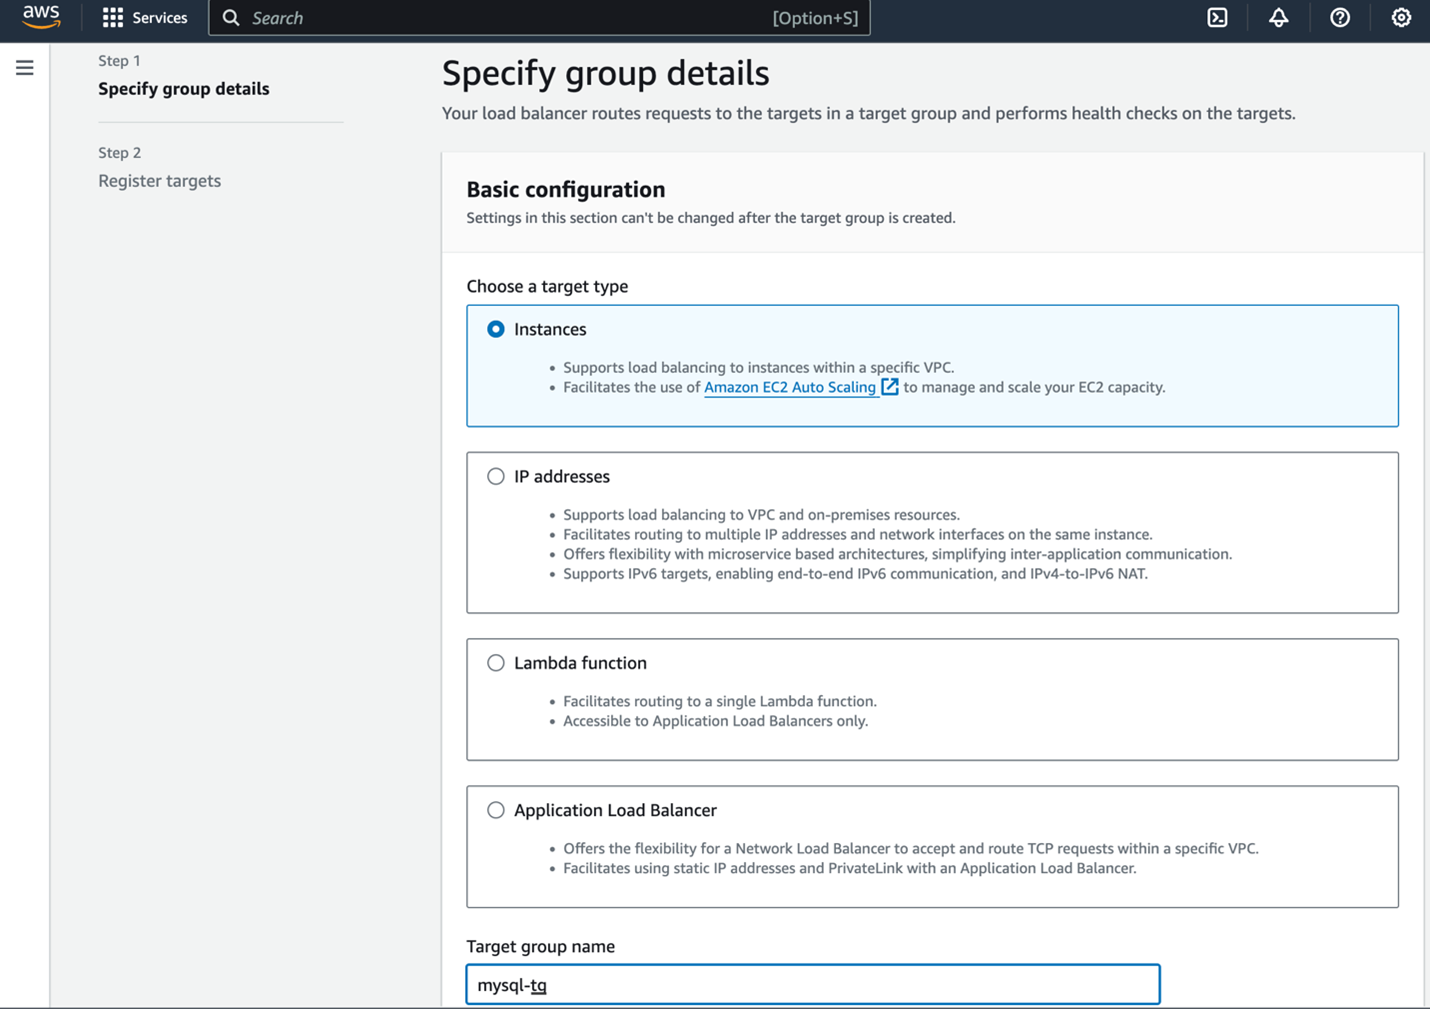
For the basic configuration panel, do as follows:
-
For Choose a target type, select Instances to register targets by entity ID, IP addresses to register targets by IP address, or Application Load Balancer to register an Application Load Balancer as a target.
-
For Target group name, enter a name for your target group.
-
For Protocol, choose the protocol as follows:
-
If the listening protocol is TCP, select TCP or TCP_UDP.
-
If the listening protocol is TLS, select TCP or TLS.
-
If the listening protocol is UDP, select UDP or TCP_UDP.
-
If the listening protocol is TCP_UDP, select TCP_UDP.
-
-
(Optional) For Port, edit the default value as needed.
-
For IP address type, choose IPv4 or IPv6. This option is only available if the target type is Instances or IP addresses and the protocol is TCP or TLS.
- You must combine IPv6 target groups with a dualstack load balancer. All targets in the target group must have the same IP address type. You cannot change the IP address type of the target group after you create it.
-
For VPC, choose the Virtual Private Cloud (VPC) with the targets you want to register.
-
-
For the Health checks panel, edit the default settings as needed. For advanced health check settings, choose the health check port, count, timeout, interval, and success codes. If consecutive health checks exceed the Unhealthy threshold count, the load balancer removes the target from service. If consecutive health checks exceed the Healthy threshold count, the load balancer returns the target to service. For more information, see Health checks for your target group.
-
(Optional) To add a tag, expand Tags, choose Add tag, and enter the tag key and value.
-
Choose Next.
Registering Targets
In AWS, you can register targets for your target group. Targets can be EC2 servers, IP addresses, or an Application Load Balancer. This is an optional step in the load balancing process. However, you need to register your targets to ensure that your load balancer can route traffic to them.
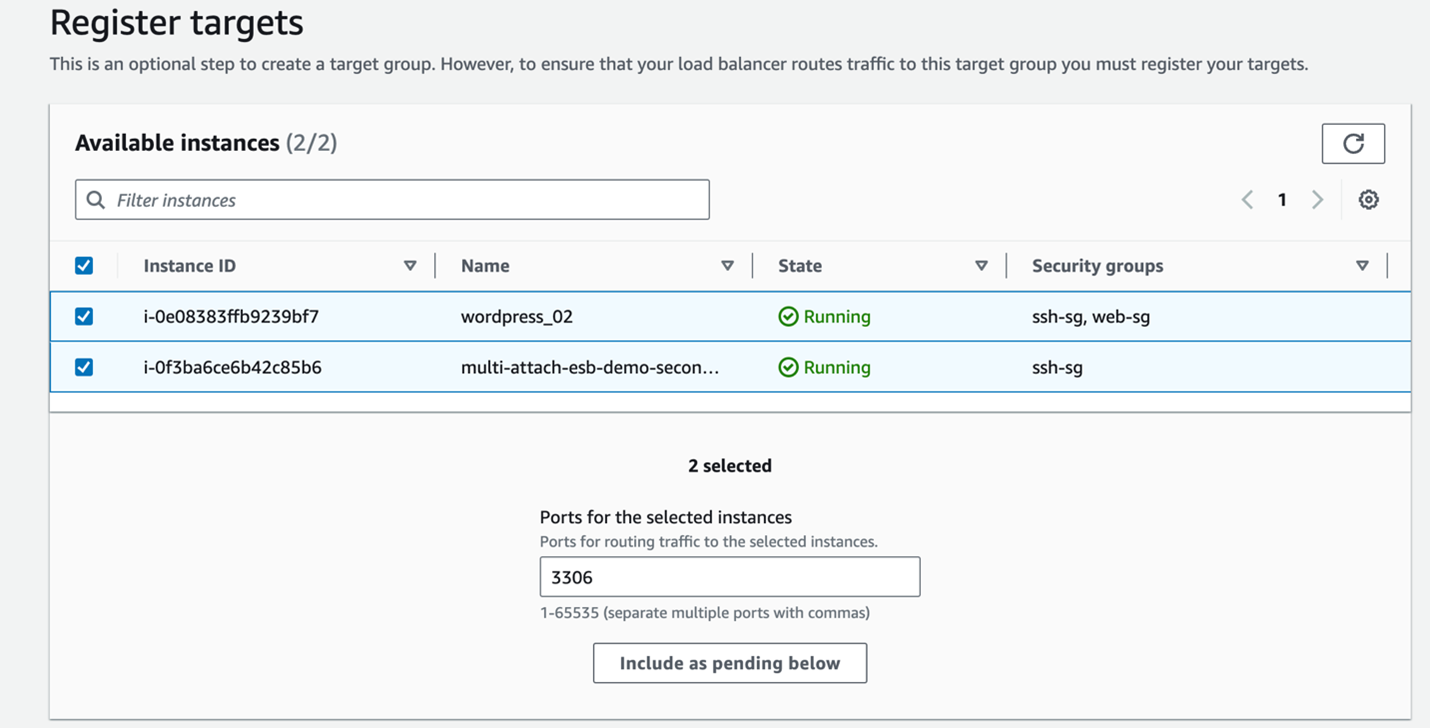
On the Register targets page, you can add one or more targets as follows:
-
If the target type is Instances, you can select EC2 servers, enter ports, and then choose “Include as pending” at the bottom.
-
If the target type is IP addresses, you can select a network, enter IP addresses and ports, and then choose “Include as pending” at the bottom.
- If the target type is Application Load Balancer, you can select an existing Application Load Balancer.
Then, simply choose “Create target group.”

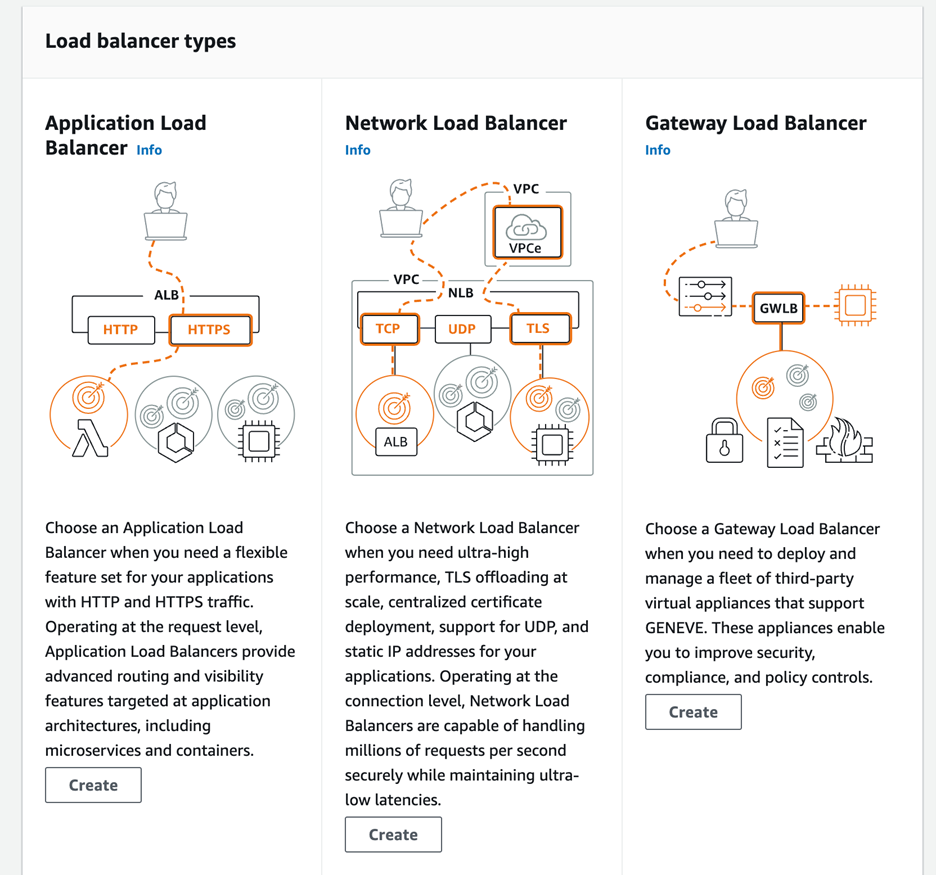
Configuring Load Balancer and Listener
To create a Network Load Balancer on AWS, follow these steps to configure it correctly.
Step 1: Basic Configuration
-
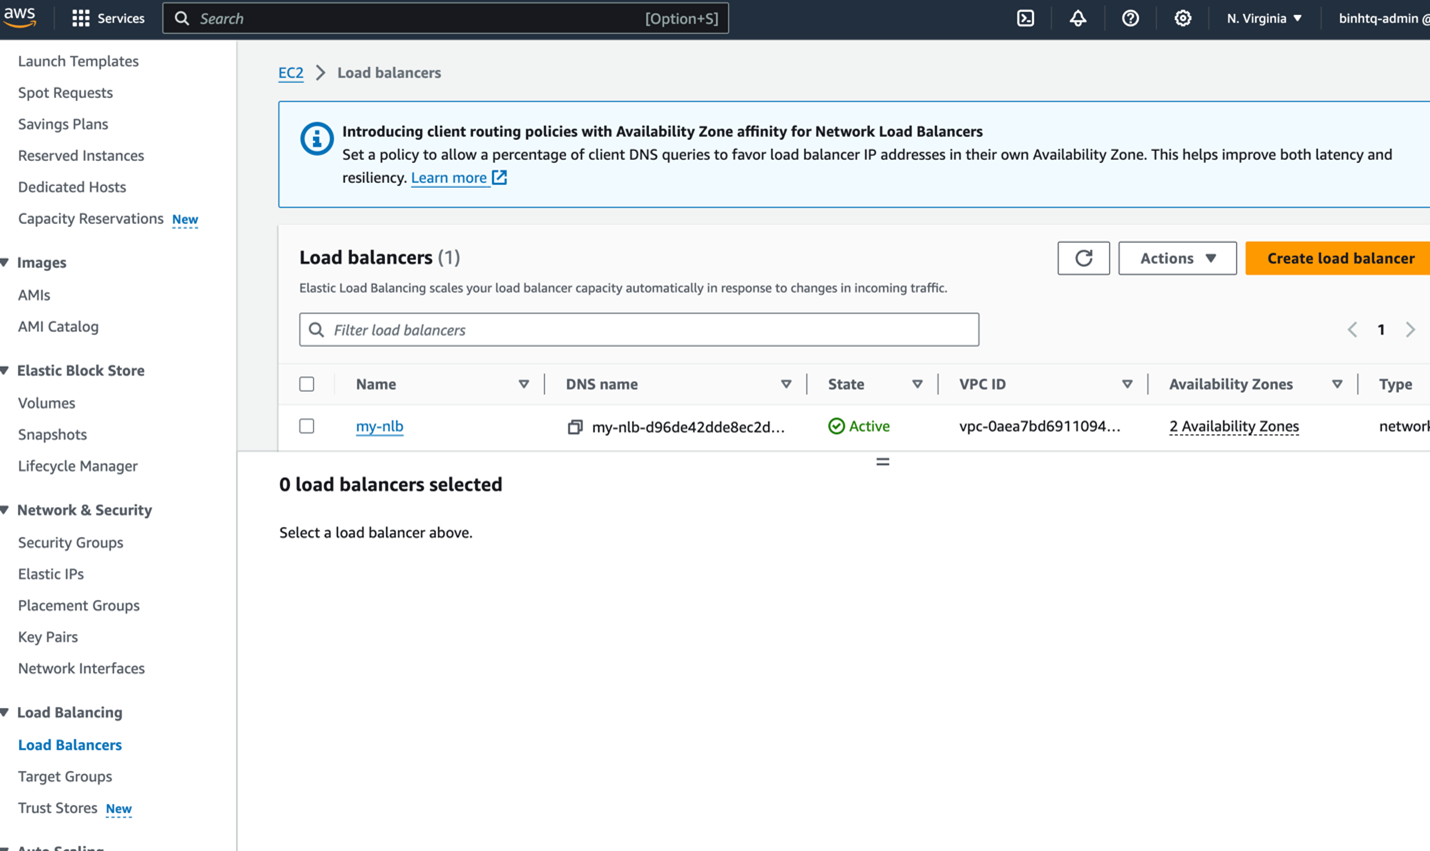
Go to the Amazon EC2 management console.
-
In the navigation pane, select Load Balancers.
-
Choose Create load balancer.
- Under Network Load Balancer, select Create.
-
For Load balancer name, enter a unique name for your load balancer, e.g., my-nlb. The name can be up to 32 characters long and should only contain letters and numbers as well as hyphens. It should not start or end with a hyphen or be internal-.
-
For Scheme, choose Internet-facing or Internal. An internet-facing load balancer routes client requests to targets over the internet, while an internal load balancer routes requests to targets using private IP addresses.
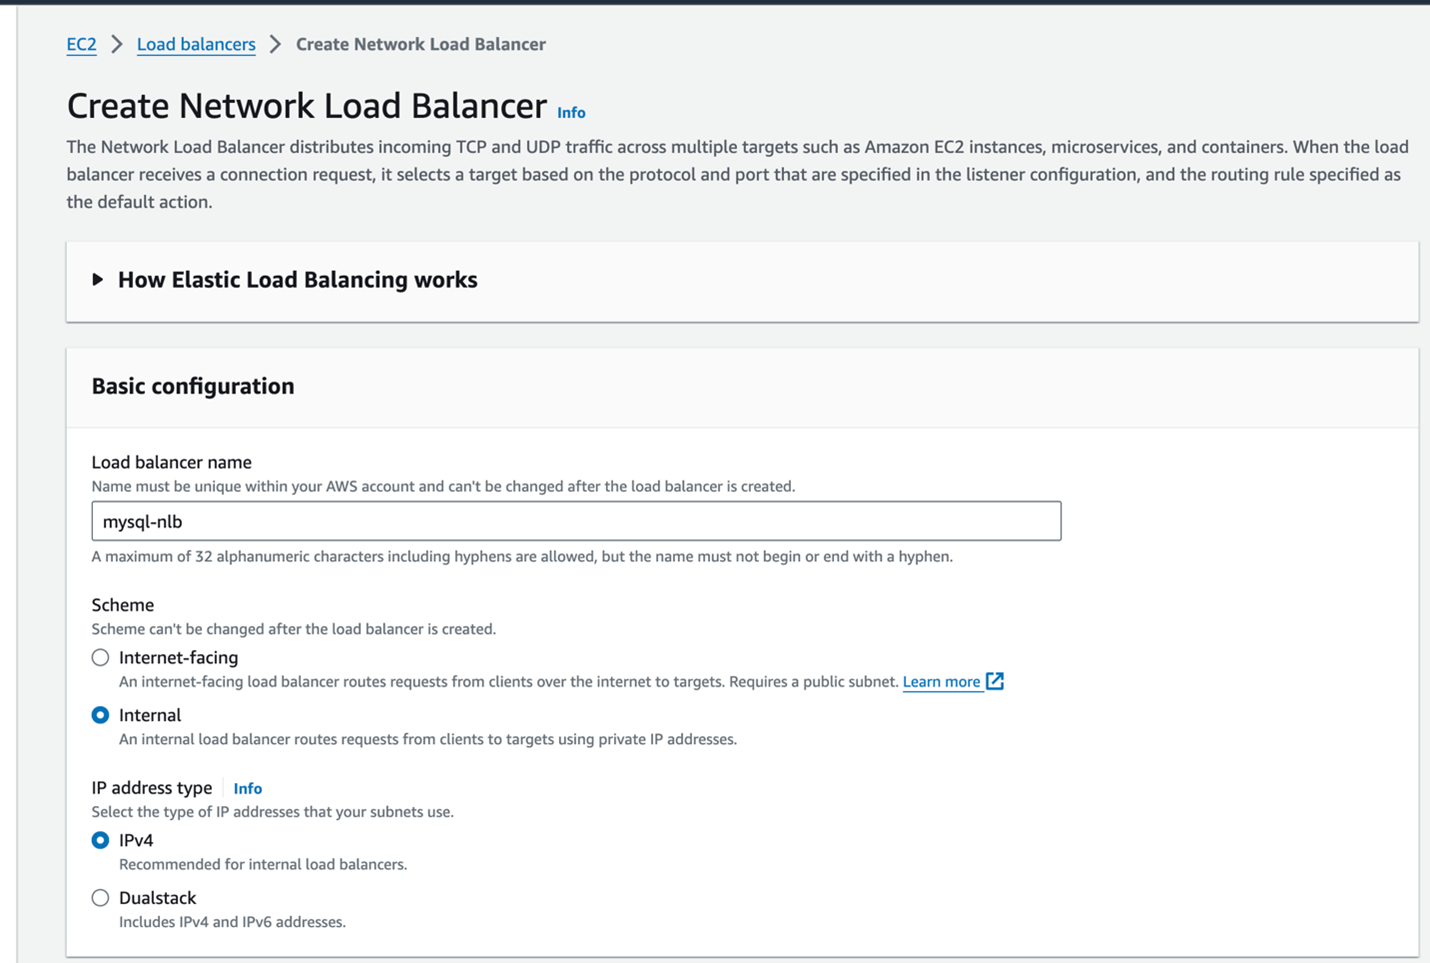
- For IP address type, choose IPv4 if your clients use IPv4 addresses or Dualstack if they use both IPv4 and IPv6 addresses to communicate with the load balancer.
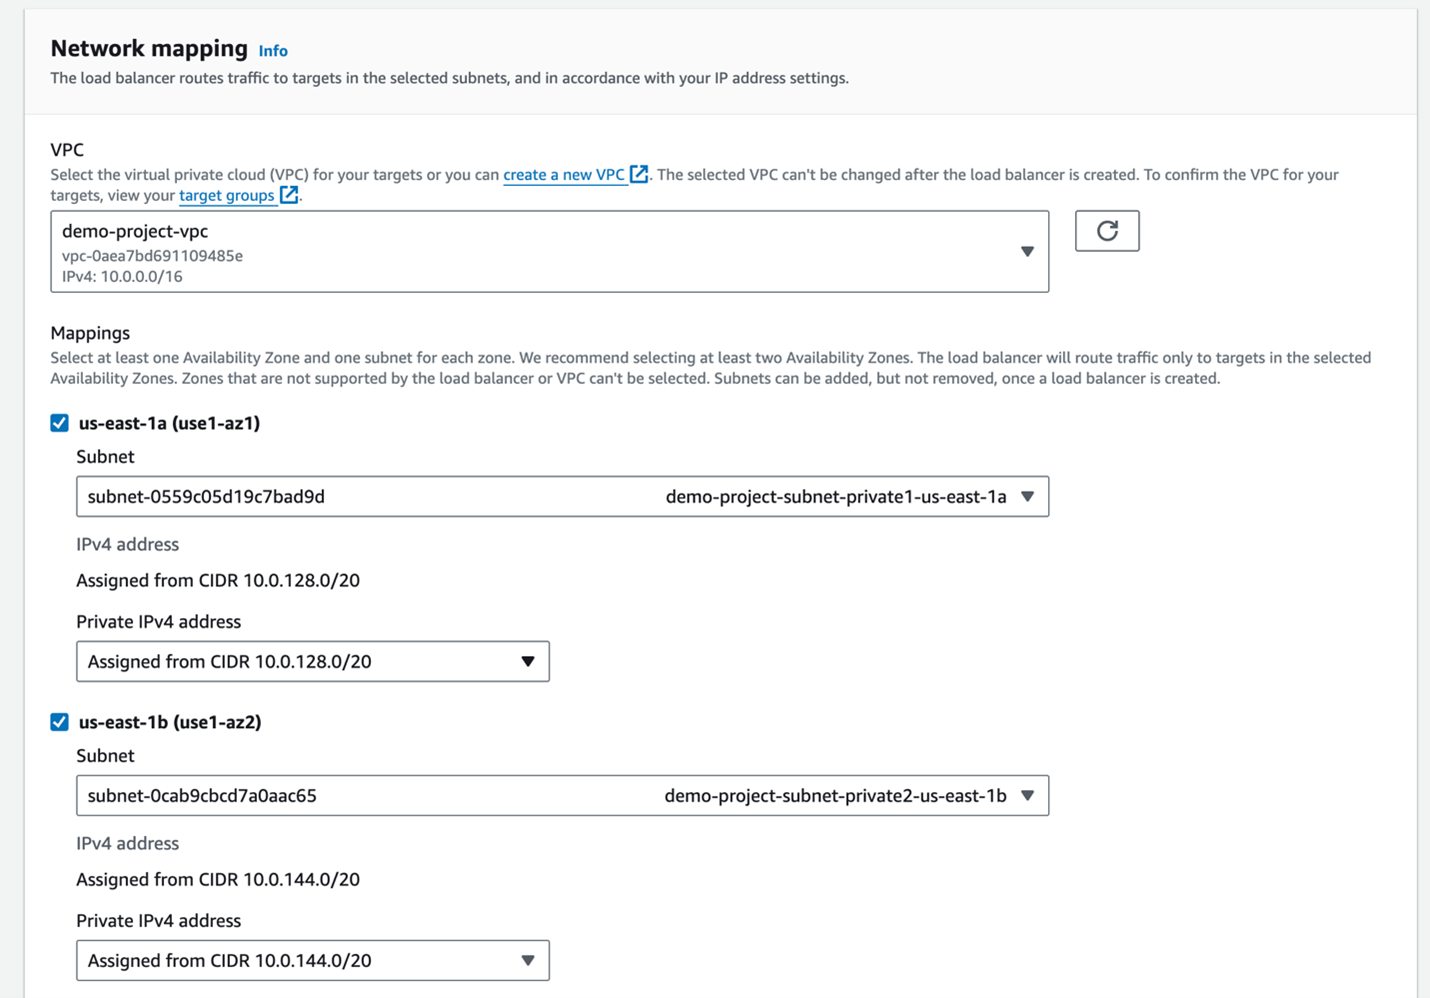
Step 2: Network Mapping
- For VPC, select the VPC you’ve used for your EC2 instances. Note that if you selected Internet-facing for Scheme, only VPCs with internet gateways are available to choose. Here select Internal.
-
For Mappings, select one or more Availability Zones (AZ) and the corresponding subnets to increase fault tolerance.
-
For an internet-facing load balancer, you can choose an Elastic IP address for each AZ or just private IP addresses from the IPv4 range of each subnet for internal load balancers.
-
For Security groups, you can use the default security group for your VPC or create a new one that fits your security needs.
Warning: If you do not associate any security groups with your load balancer right now, you will not be able to associate them later.
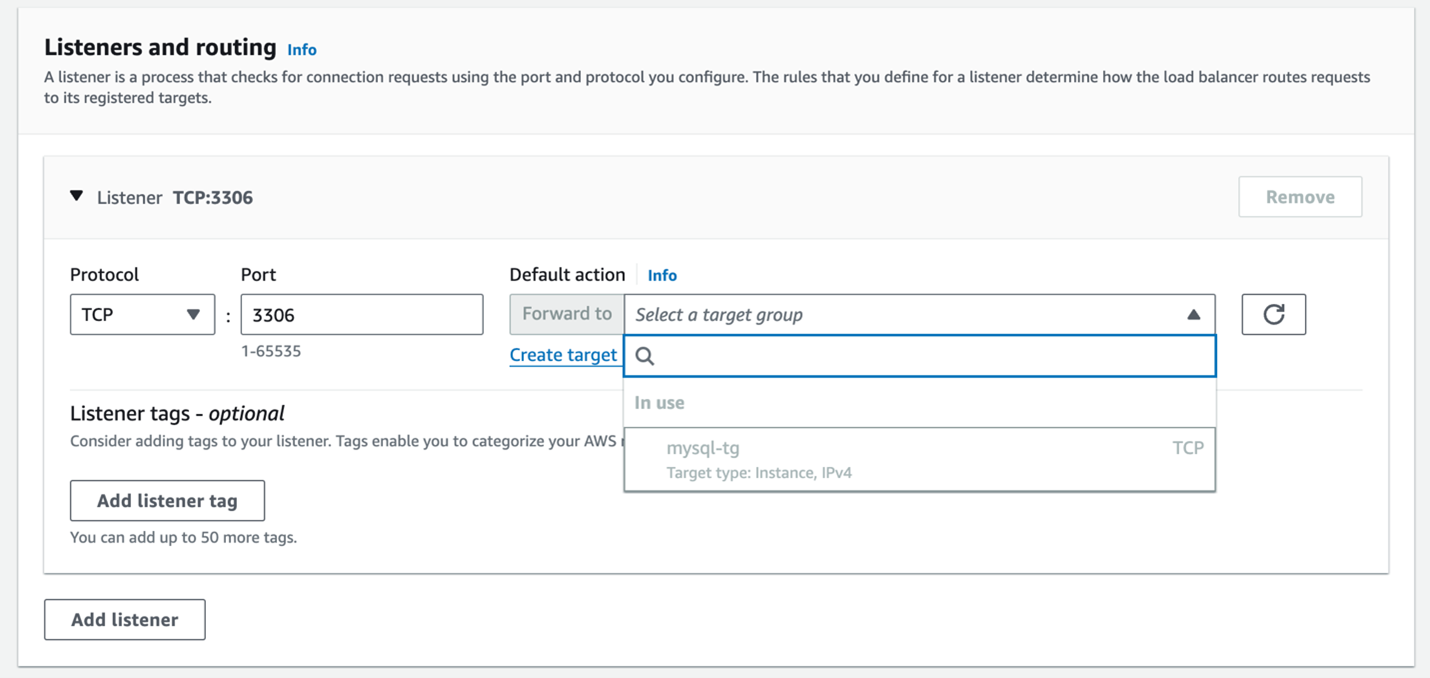
Step 3: Listeners and Routing
-
By default, a listener accepts TCP traffic on port 3306. You can keep these settings or edit the Protocol and Port as needed.
-
For Default action, choose a target group to forward traffic to. If you haven’t created a target group previously, you must create one now. Optionally, you can add another listener (e.g., a TLS listener) if needed.
-
Optionally, you can add labels to categorize your listeners.
Step 4: Secure Listener Settings (TLS Listeners Only)
-
For Secure listener settings (only for TLS listeners), do the following:
-
Choose a security policy that meets your requirements for Security policy.
-
Choose a policy to enable or disable ALPN for ALPN policy.
-
Choose a default SSL certificate from ACM or upload one if needed.
-
-
Optionally, you can use Add-on services with your load balancer, such as AWS Global Accelerator.
Step 5: Tags (Optional)
- You can add tags to categorize your load balancer for better organization.
Step 6: Review
-
Review your configuration settings.
-
Choose Create load balancer.
Some default properties will be applied to your load balancer during creation, and you can view and edit them once the load balancer is created.